Screen-sharing & Camera-sharing
Screen sharing
This feature allows a participant of a Surfly session to share their screen or an application.
This feature provides a convenient way to show something that is not browsable on the web, like a desktop application or a local file.
Please be conscious of what you are sharing via screen sharing, and try to keep your private information (like images and passwords) safe while sharing your screen.

Setup
Turn on the option enable_screensharing that can be found in the “Session functionality” section in the Dashboard Settings.
Please note that in order to use the screen sharing feature, you must also enable the videochat_enabled option. This option can be found under the "Interface Options" section in the Dashboard Settings.
How to use
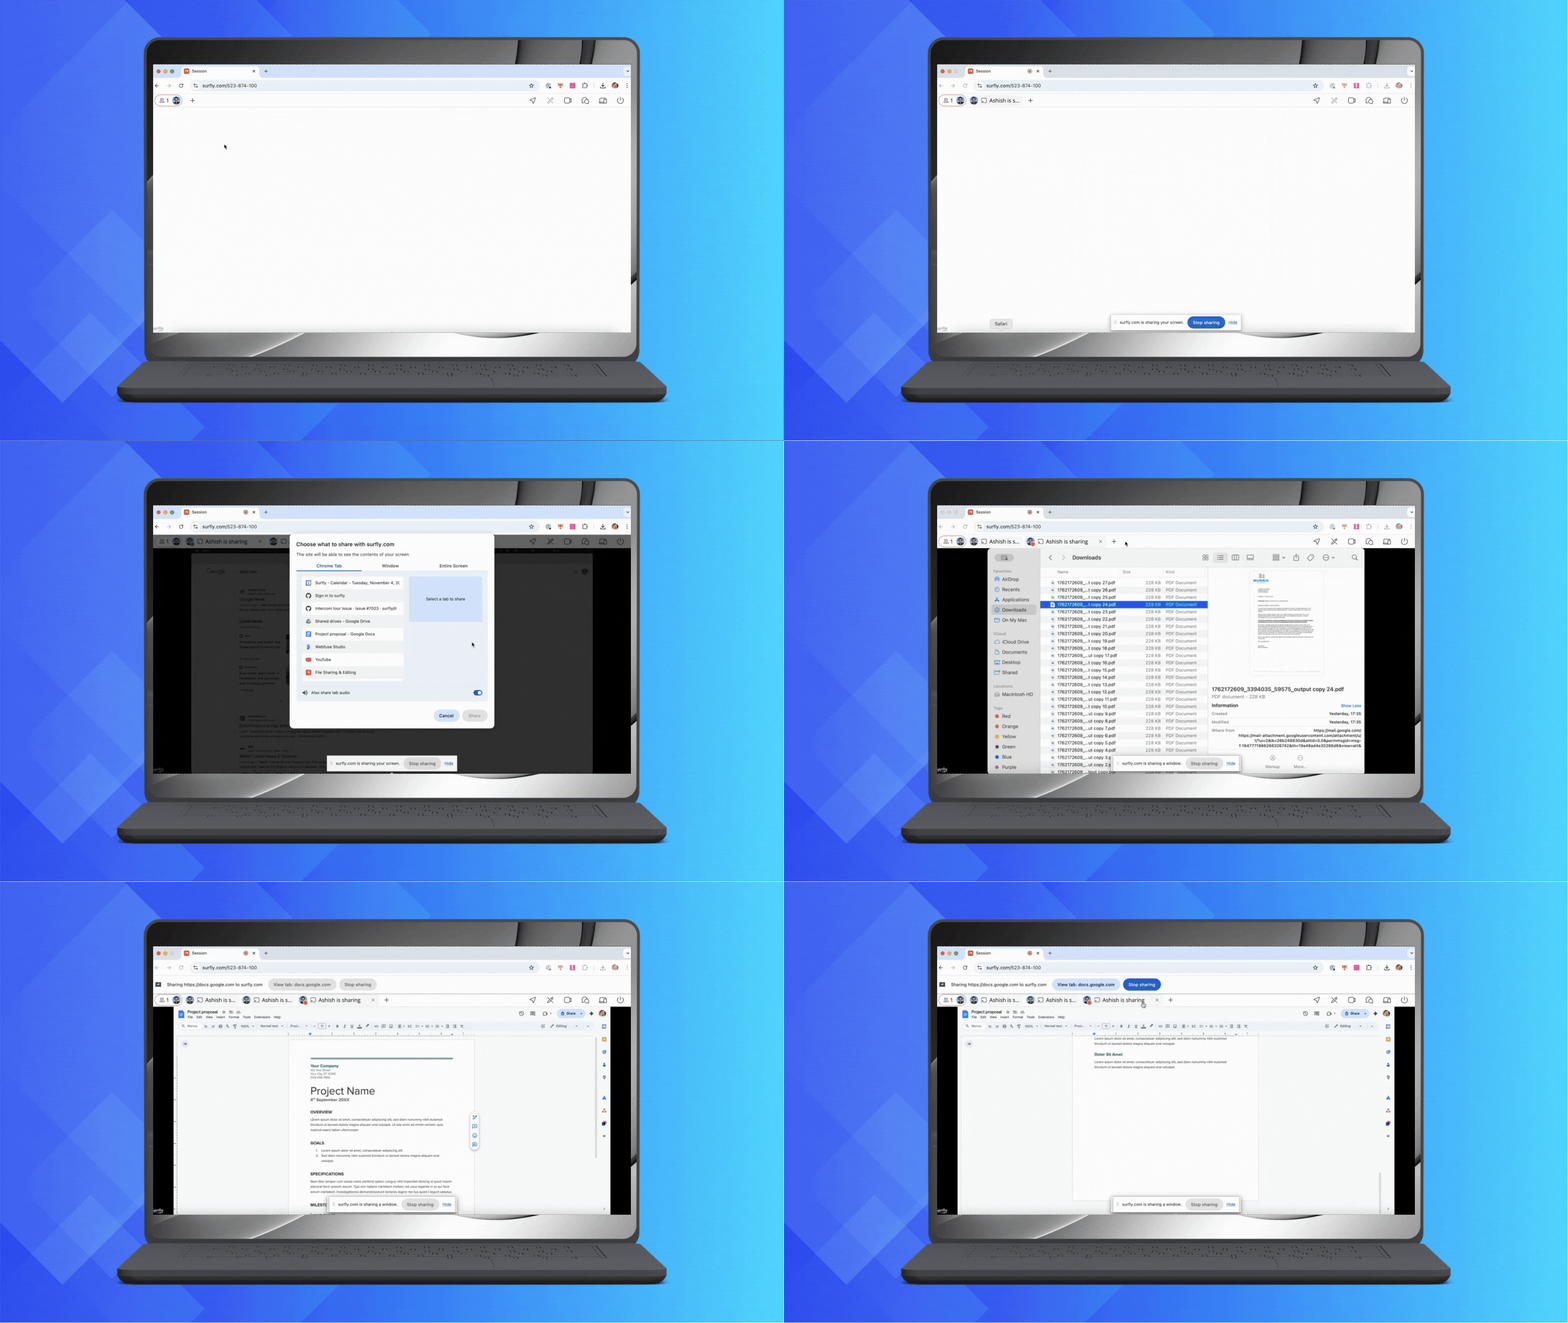
To share your screen, simply click “+” as if you want to open a new tab.
In the modal that appears, click the button “Share your screen”.

Next, select what you want to share (window, screen, tab) from your browser's native dialogue.
To stop screen sharing
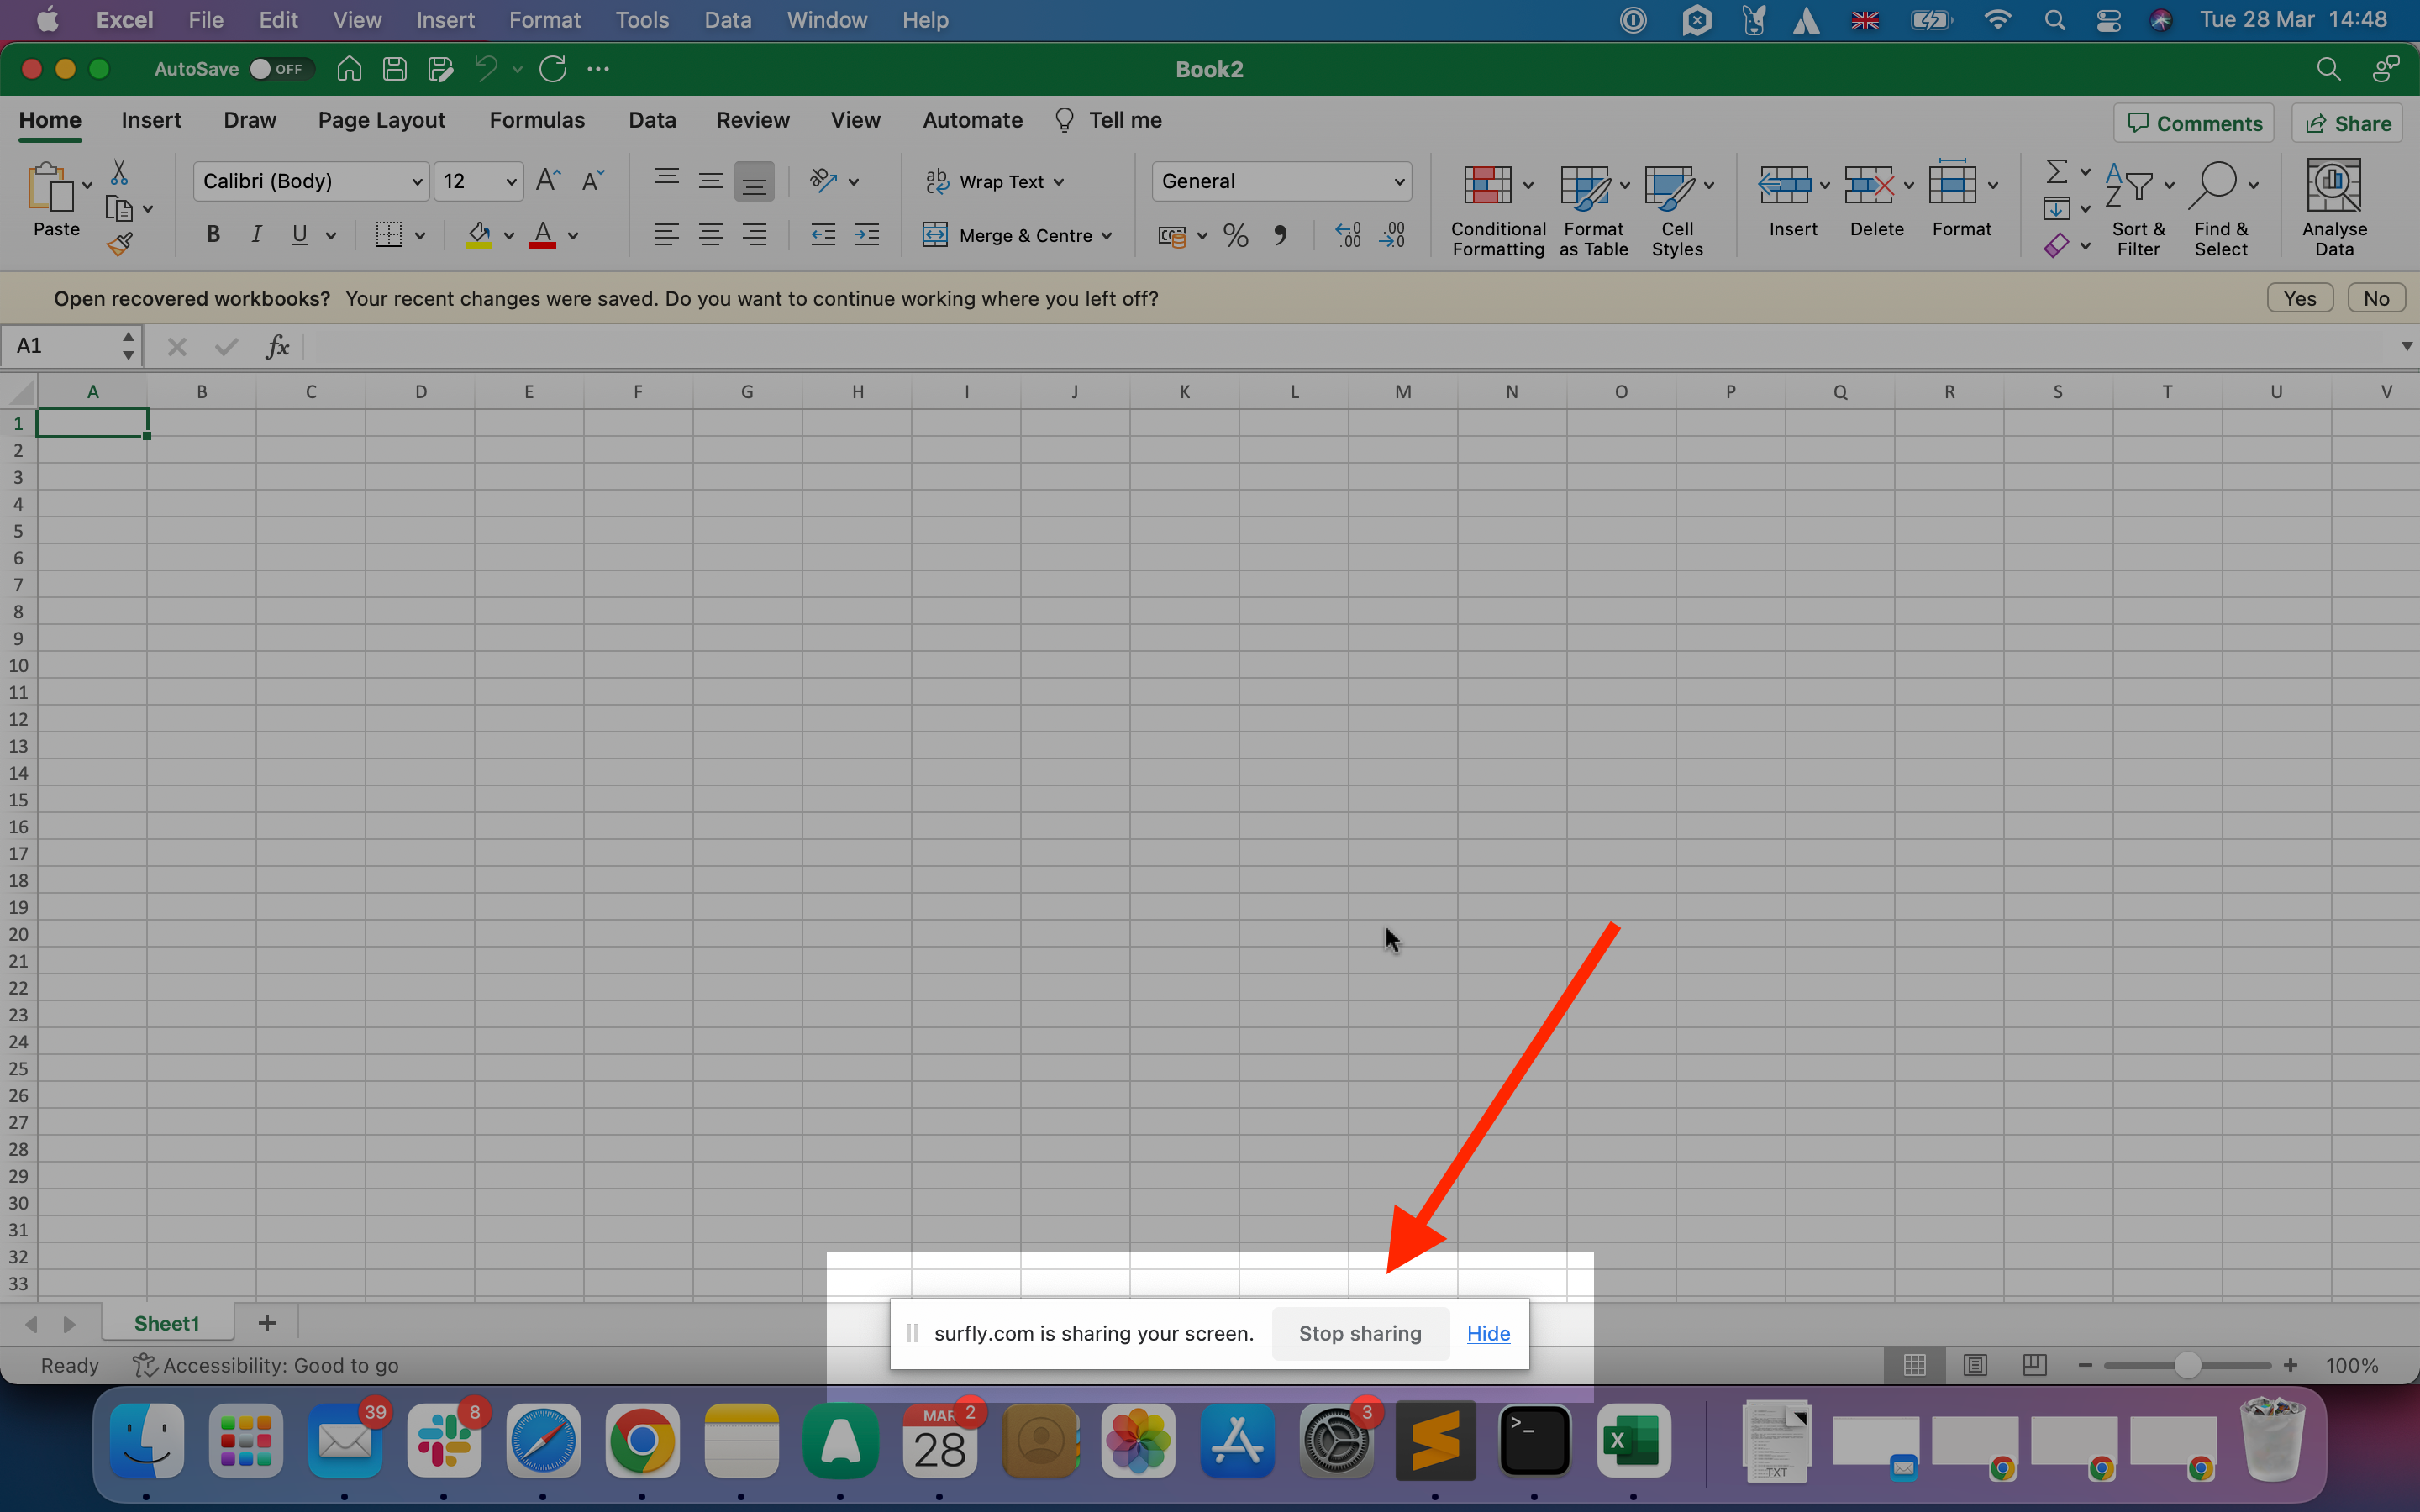
You can either close the Tab (or Window) where you were sharing or use this option below that you will on you browser all the time.

When you are sharing more than just a Tab, you can also “Stop sharing” screen anytime from the bottom of your screen, even if you are using another program/software.

If you pass control of the session to another user while sharing your screen, your screen sharing continues, but you always can stop it by clicking the “Stop sharing” button.
Camera Sharing
This feature lets you share a live camera feed as content and allow on-screen annotations for real-time guidance, device support, or KYC scenarios.
As with other Surfly session features, no installation is required. First-time users can start using it instantly by granting browser permissions.

How to Enable
Ensure the videochat_enabled option is enabled in the Interface Options section in Dashboard Settings. Camera sharing uses the same permissions as video chat, so no extra setup is needed.
How to Use
Click “+” as if opening a new tab.
In the modal, select the Share your camera feed icon.

Choose the camera you want to share, and your live feed will appear in the session.
Example Use Cases
Remote Assistance – Guide someone through a physical setup or troubleshoot an issue by marking directly on your live camera feed.
Real-time Document Review – Share contracts, invoices, or IDs and highlight key sections as you discuss them.
Retail & Showrooms – Let customers see products in real time and use annotations to explain details.
How to Stop Camera Sharing
Simply close the tab where your camera feed is being shared or click the Stop sharing button.
