
Introduction
This article provides a step-by-step guide to implementing Surfly for an outbound phone call, integrated with NICE InContact ACD/IVR.
The Flow
The outbound call flow revolves around adding a button in the Launch section. Here’s an overview of how the process works:
-
Agent Initiates the Outbound Call:The agent starts an outbound call with the customer.
-
Agent Launches Surfly: The agent clicks the launch button within Max Agent or CXone Agent.
-
Surfly Start Page Opens: The Surfly start page is automatically opened.
-
Agent Begins Surfly Session: The agent adds the session link where they would like to interact with the customer.
-
Invite the Customer: In the Invite pop-up, the agent sends an email invitation to the customer to join the Surfly session.
-
Customer Joins the Session: The customer receives the email and clicks on the provided link to join the agent in the Surfly session.
Implementation Steps
To implement this flow, follow these four milestones:
-
Creating a Skill
-
Configuring the Studio Scripts
-
Configuring Script Schedule
Quick Start
Before starting the implementation, please download the scripts linked below:
-
Studio Scripts for Download:
-
add_button: Add button to Start a Surfly Session at Launch
-
remove_button: Remove button to Start a Surfly Session at Launch
-
Creating a Skill
-
Log in to your ACD account.
-
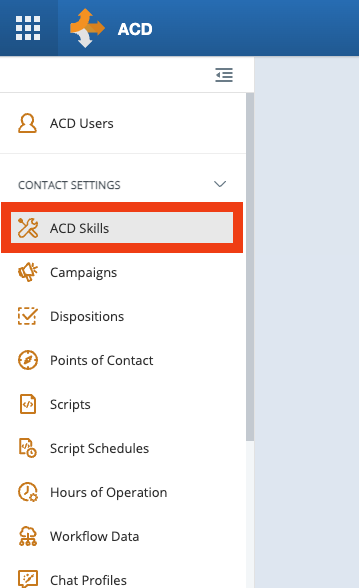
Navigate to ACD Skills:
-
Click on
Create Newand selectSingle Skill.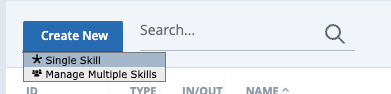
-
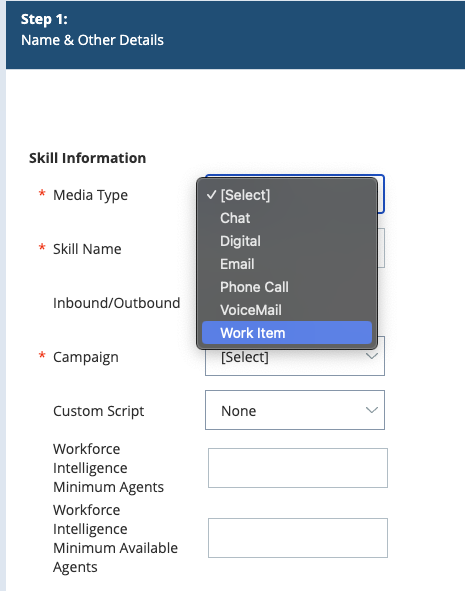
Select Media Type: “Work Item”.
-
Add a name and select the campaign.
-
Click on
Create. -
Save the Skill ID for later
-
Configuring the Studio Scripts
Add_Button Script Configuration
-
Import the Script:
-
Import the "add_button" script into your Studio Script account.
-
-
Update the Administrator:
-
Replace the placeholder at "Administrator DO NOT DELETE" with the correct Administrator details.
-
-
Update the Skill ID:
-
Replace the placeholder in "Get Agents that are assigned to Skill" with the appropriate Skill ID.
-
Remove_Button Script Configuration
-
Import the Script:
-
Import the "remove_button" script into your Studio Script account.
-
-
Update the Administrator:
-
Replace the placeholder at "Administrator DO NOT DELETE" with the correct Administrator details.
-
Configuring Script Schedule
-
Create a New Schedule:
-
Go to ACD → Script Schedules → Create and set up a new schedule to execute the scripts.
-
-
Select Add_Button Script:
-
From the script list, choose the "add_button" script and set the schedule type to Recurring.
-
-
Set Start Time:
-
Configure the "Starts On" time to a period with low or no incoming calls.
-
-
Set Recurrence:
-
Set the script to recur Daily, every 1 day.
-
-
End Settings:
-
Set the schedule to Ends: Never.
-
-
Select Remove_Button Script:
-
Select the "remove_button" script for scheduling.
-
-
Set Start Time for Remove_Button:
-
Schedule the "remove_button" script to start at least one hour before the "add_button" script runs.
-