Introduction
This document will guide you through the steps to integrate Surfly into your CXOne platform.
It includes the following sections:
Studio Implementation
Step by step, all the changes needed on your current Studio scripts in order to integrate Surfly into your CXOne platform.
Javascript Integration File
How to generate the Javascript file that you need to include in your website in order to use Surfly with CXOne.
Integration Testing
All the steps necessary to test and troubleshoot your integration.
User Flows
All the available user flows that we offer with this integration, and all the things you can do with Surfly.
Studio Flow Description
In depth explanation of the Studio flow, and how it communicates with the Javascript file.
Before You Begin
You will need:
Please download the script as per the flow
on_call.xml: used for the phone flow
on_chat.xml: used for the CXOne chat flow
on_chat_salesforce.xml: used for the CXOne chat flow (Salesforce app)
IB_Video_WI.xml: used for the videochat flow
Surfly_Signaler.xml: used to trigger the OnSignal branch of the chat script
-
Your Scaledrone Channel ID and Authentication token
-
Your Surfly’s widget key
- Log in into https://app.surfly.com
- Go to Settings → Integration → Widget Key -
Your Business Unit (BU) number
-
Access to Studio and the CXOne platform
CXOne Chat Flow Integration
Flow Description
This flow allows an Agent to send a co-browsing invite to a customer using the CXOne chat.
The Agent will be chatting with the customer through the CXOne chat. The customer may be stuck on the website, or may need help to fill in a form or complete a purchase.
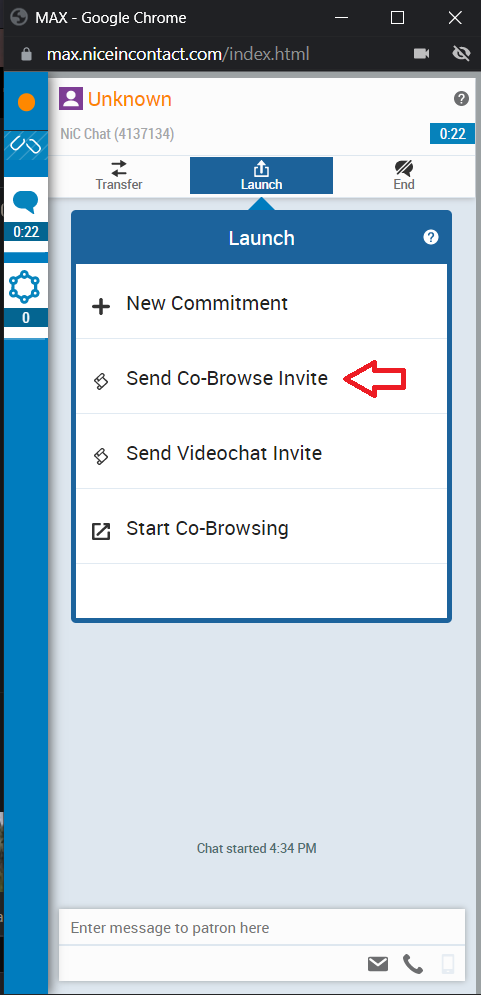
The agent will click on the “Send Co-browse” indicate:

After the user consents, he/she will start a cobrowsing session and the agent will join in.
Script
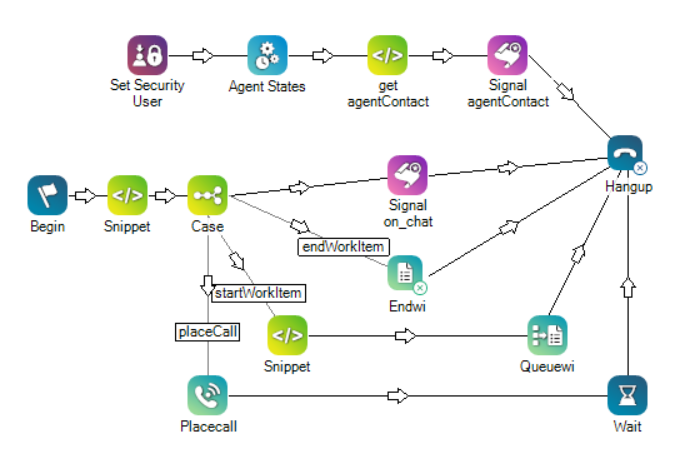
Import the on_chat.xml file into Studio. You can save the file if you don’t have any chat scripts in your environment yet. Otherwise, you will have to integrate the script’s flow into your current one, as described below.
The file should look like this:
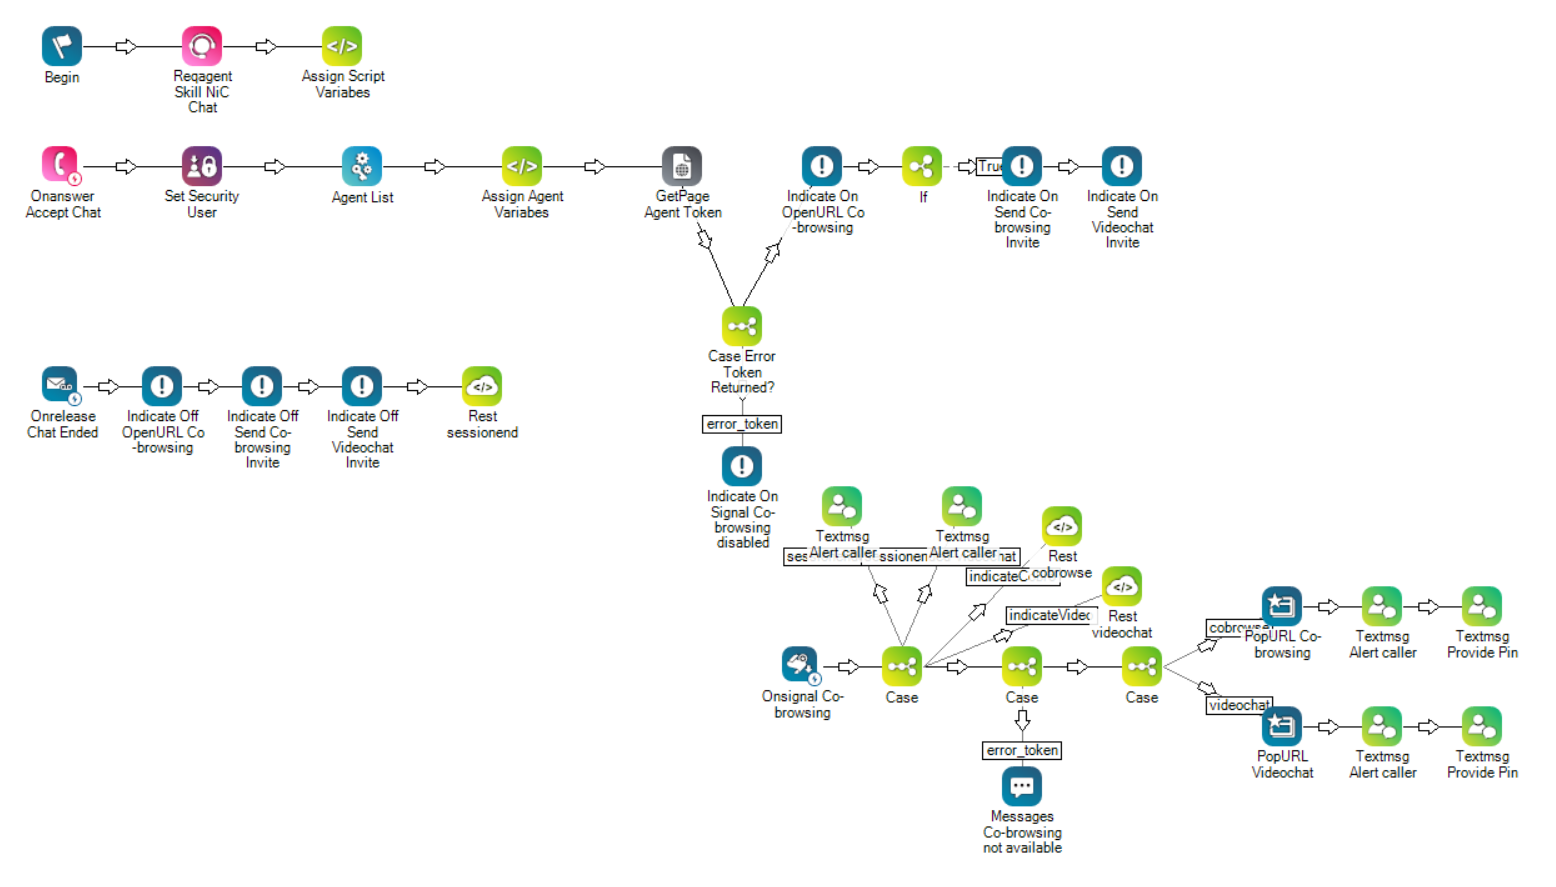
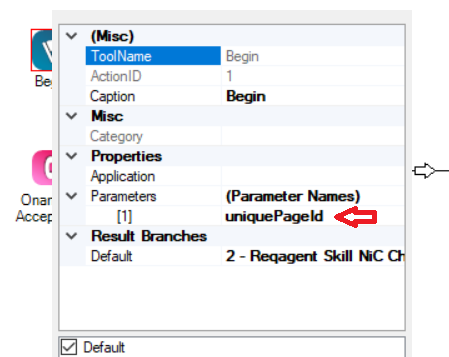
Begin Branch
Add the uniquePageId to the list of parameters. If you already have any parameters on your list, make sure that you add uniquePageId as the last one.
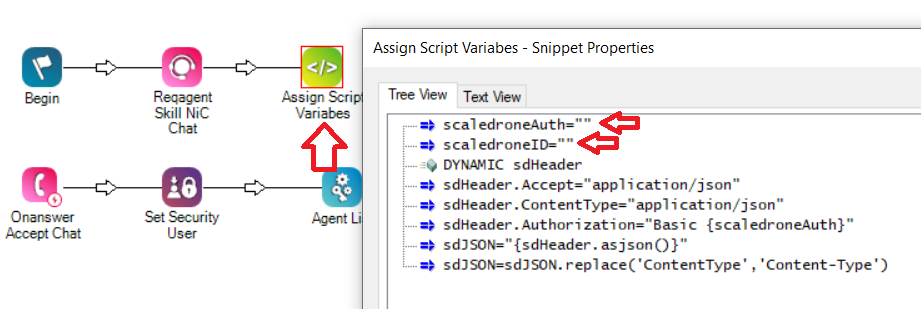
Append the ReqAgent Skill NiC Chat and Assign Script Variable actions to the end of your existing Begin branch.
Enter your ScaledroneID and Scaledrone Authentication Token values on the Assign Script Variables action’s data field.
The uniquePageId value is a unique value generated by the Javascript file (see Javascript Implementation File) on the customer’s browser. It’s passed to Studio and used to identify each customer that initiates a CXOne chat session, and to identify the recipient of the Scaledrone message that will start the co-browsing session triggered by the Agent (see Chat Flow)
The Scaledrone variables configured in the Assign Script Variables action will be later used in the OnSignal Co-Browsing branch to call your Scaledrone channel.
OnAnswer Branch
Append all the actions after the OnAnswer action to your existing OnAnswer branch, as shown below:
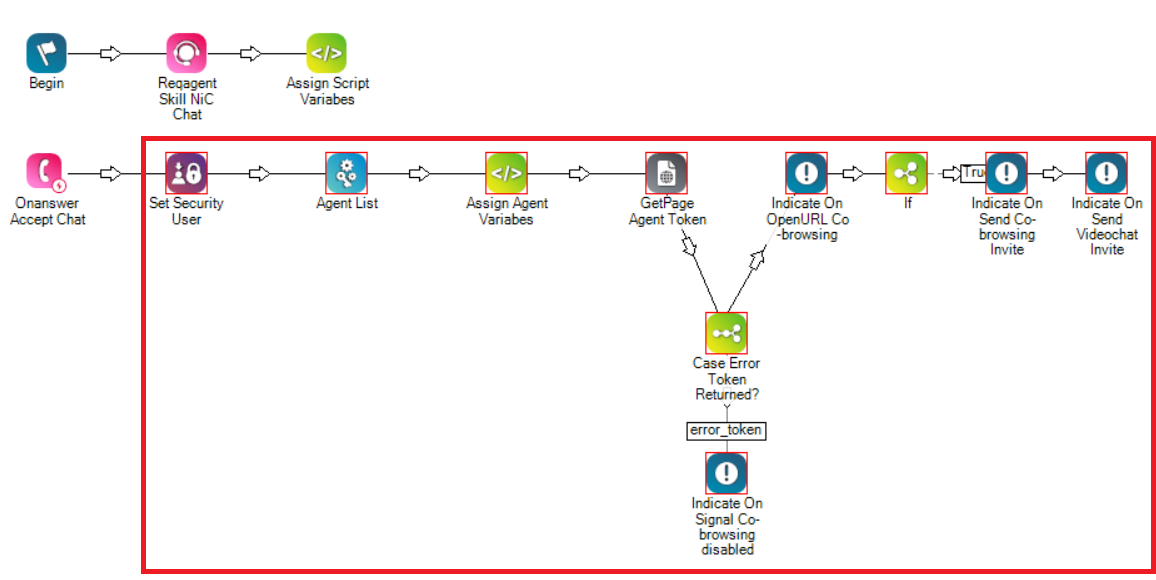
On the Set Security User action, select a user that has Admin privileges.
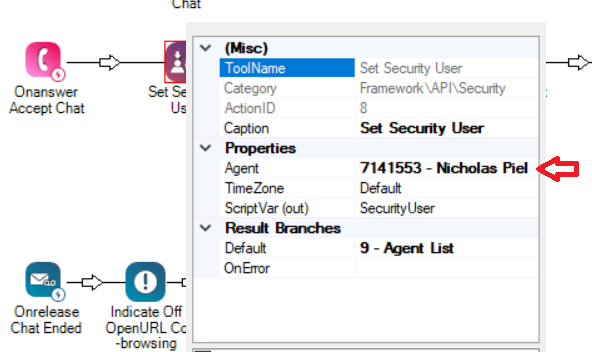
This branch will attempt to check if the current CXOne Agent is registered in Surfly’s database. The GetPage Agent Token action will make a call to Surfly to check if the Agent exists. If it doesn’t, the account will be created using the Agent’s first and last name and email (see Assign Agent Variables action).
Then the Agent token will be returned, and the “Send Cobrowse Invite” and “Send Videochat Invite” indicators will be displayed in the Agent’s MAX option’s bar.
OnRelease Branch
Add the OnRelease Chat Ended branch to your setup, or append all the actions after OnRelease Chat Ended action to your existing branch.
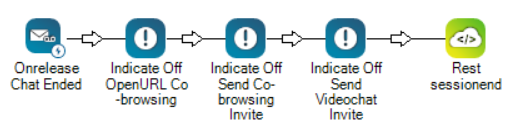
This branch is to make sure that the “Send Cobrowse Invite” and “Send Videochat Invite” indicators are no longer displayed once the chat session has ended.
OnSignal Branch
Add the OnSignal branch to your setup, or append all the actions after OnSignal Co-browsing Chat Ended action, to your existing branch.
NOTE: If you already have an OnSignal Branch with your own routing, follow this additional steps: 👇
In order to distinguish that the request made to Onsignal comes from your original flow, you can append a new value (for example “client“) to the existing ActionValues of the client’s indicators:
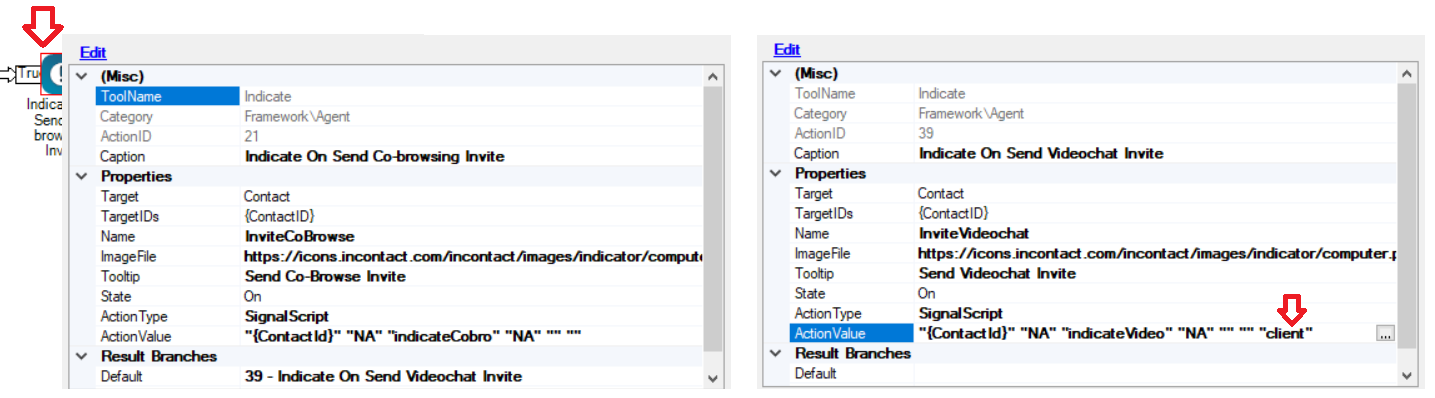
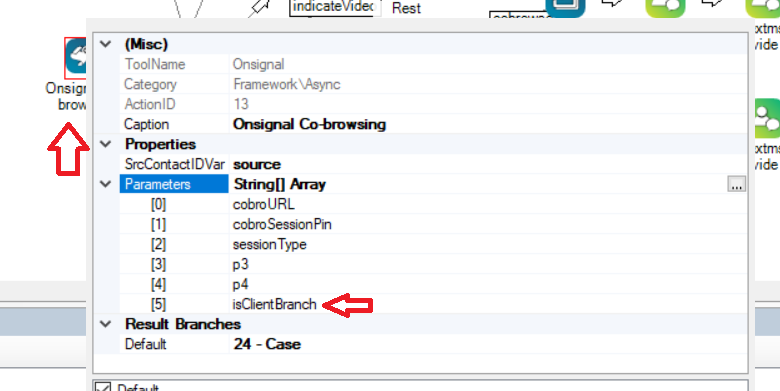
Then add this value at the end of the parameter list of the OnSignal Action. Please note that In the previous image, the first passed value {ContactId} is NOT considered parameter[0]. This first value is ignored and “NA“ would be the parameter[0].
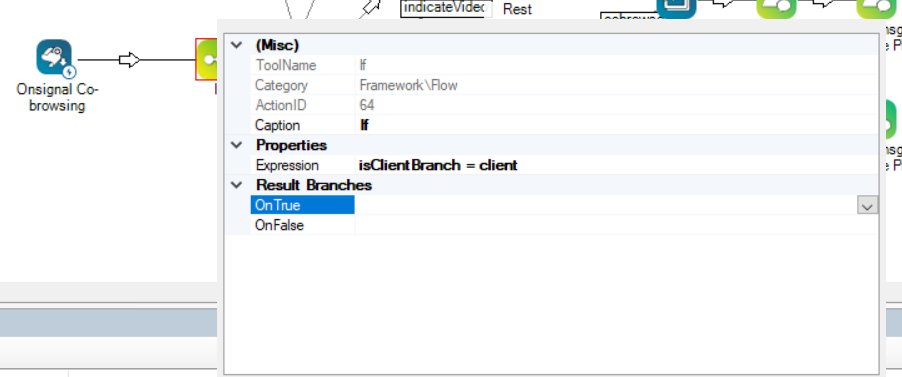
Finally, add an IF action after the OnSignal Co-browsing action to check if the indicator sent the “client“ value as the 5th parameter. If it is, go through the new flow that we created for Surfly. Otherwise, continue with your branch's original implementation.
CXOne Phone Flow Integration
Flow Description
While in a phone conversation with a customer, an agent may want to assist him/her on a part of the website.
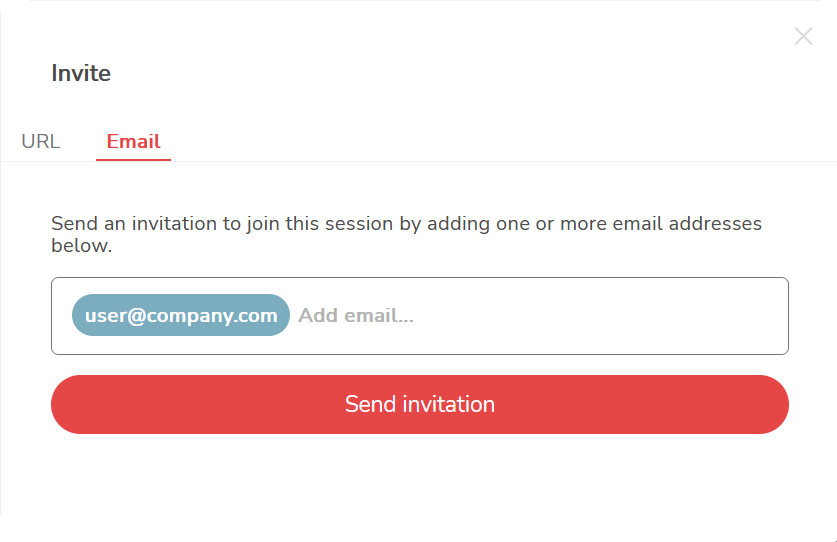
The agent will type the address he/she wants the Surfly session to start cobrowsing from, in the Surfly launch bar.

Then he/she can send the session invite link to the customer via email (or any other channel) so he/she can join the session.
Phone Script
Import the on_call.xml file into Studio. You can save the file if you don’t have any phone scripts in your environment yet. Otherwise, you will have to integrate the script’s flow into your current one, as described below.
The file looks like this:
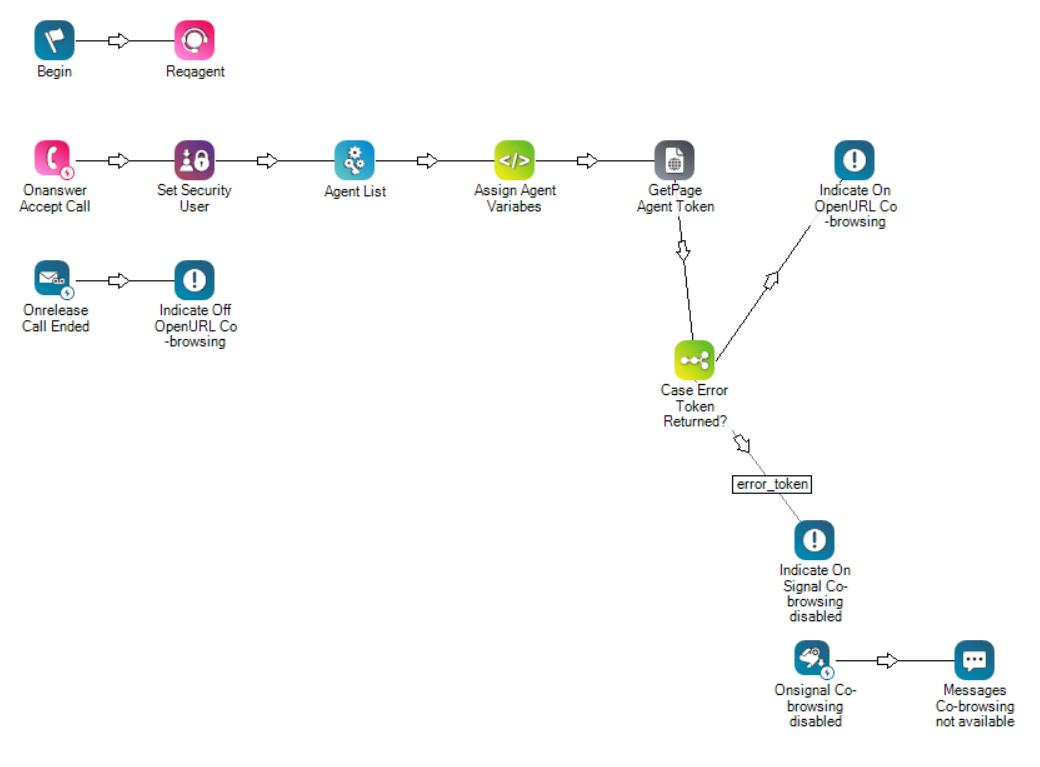
Begin Branch
Append the ReqAgent Skill NiC Chat to the end of your existing Begin branch.
OnAnswer Branch
Append to your existing OnAnswer branch, all the actions after the OnAnswer Accept Call action, as shown below:
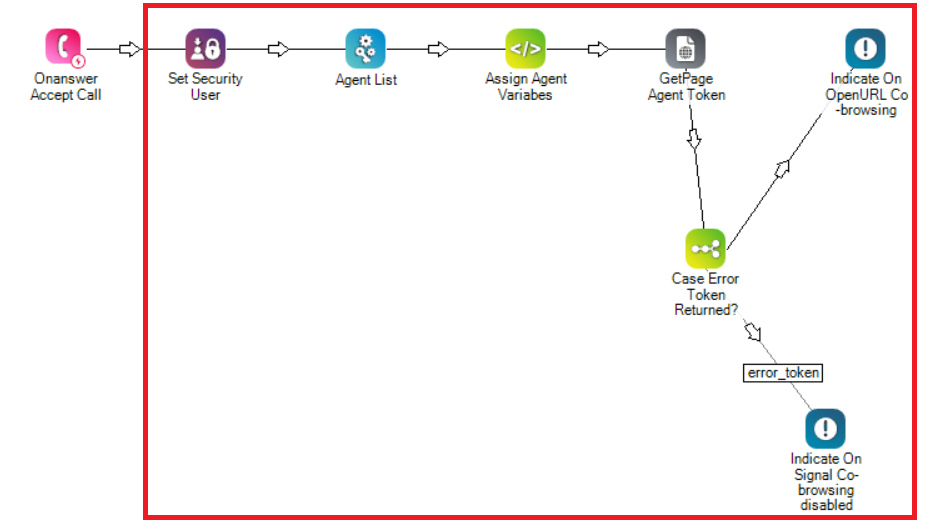
On the Set Security User action, select a user that has Admin privileges.
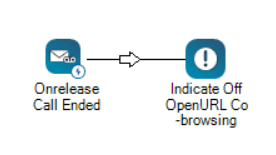
OnRelease Branch
Add the OnRelease Call Ended branch to your setup, or append all the actions after OnRelease Chall Ended action, to your existing branch.
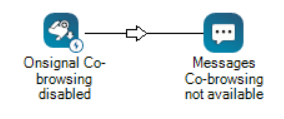
OnSignal Cobrowsing Disabled Branch
Add the Onsignal Co-browsing disabled branch to your setup, or append the Messages Co-browsing not available action, to your existing branch.
Surfly Signaler
If you are implementing either the CXOne Chat or Videochat flows, make sure to import and save the Surfly_Signaler.xml file in the root folder.
We will call this script from our Javascript file, and the signaler will call the chat script and continue the required flow to start the session on the Agent’s side.
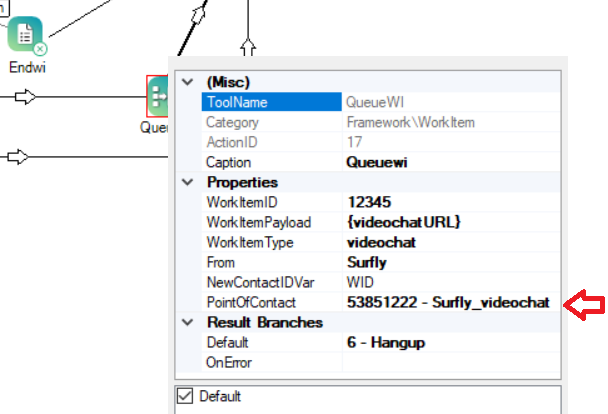
If you are implementing the Video chat flow, don’t forget to set the appropriate Point of Contact value on the Queue WI action:
Integration Javascript File
Here we describe how to generate the Javascript file that will launch the CXOne chat on your website, and will allow Surfly to communicate with the Studio implementation done in the previous steps.
You should include this file in any webpage you wish to start the CXOne chat from.
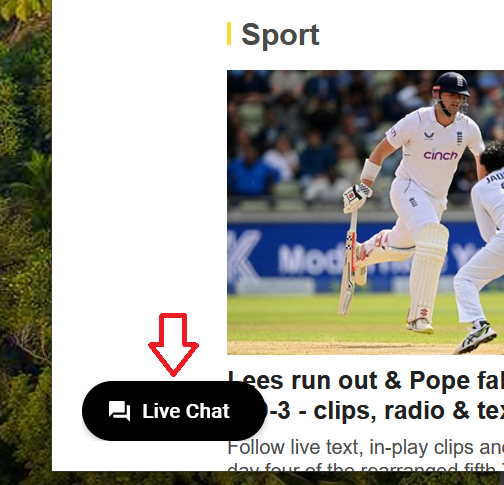
When you include the script in your page, it will generate the Live Chat and Start Videochat button.
The next steps describe how to generate some of the URLs and values needed for the Javascript file to work.
At the end of this section, you can enter these values and generate your Javascript integration file.
Spawn Links
Go to ACD → Contact Settings → Scripts → Surfly_Signaler → Spawn.

Select the chat skill that you will be using for this integration. Click “Show Shortcut“ and copy the URL in the “Shortcut to Surfly Signaler“ link. This is the Signaler Spawn URL that you will be using in the Javascript integration file (see JS file generator below).
Repeat the same process if you will be using the videochat flow. But in this case, select the Videochat skill you created in previous steps.
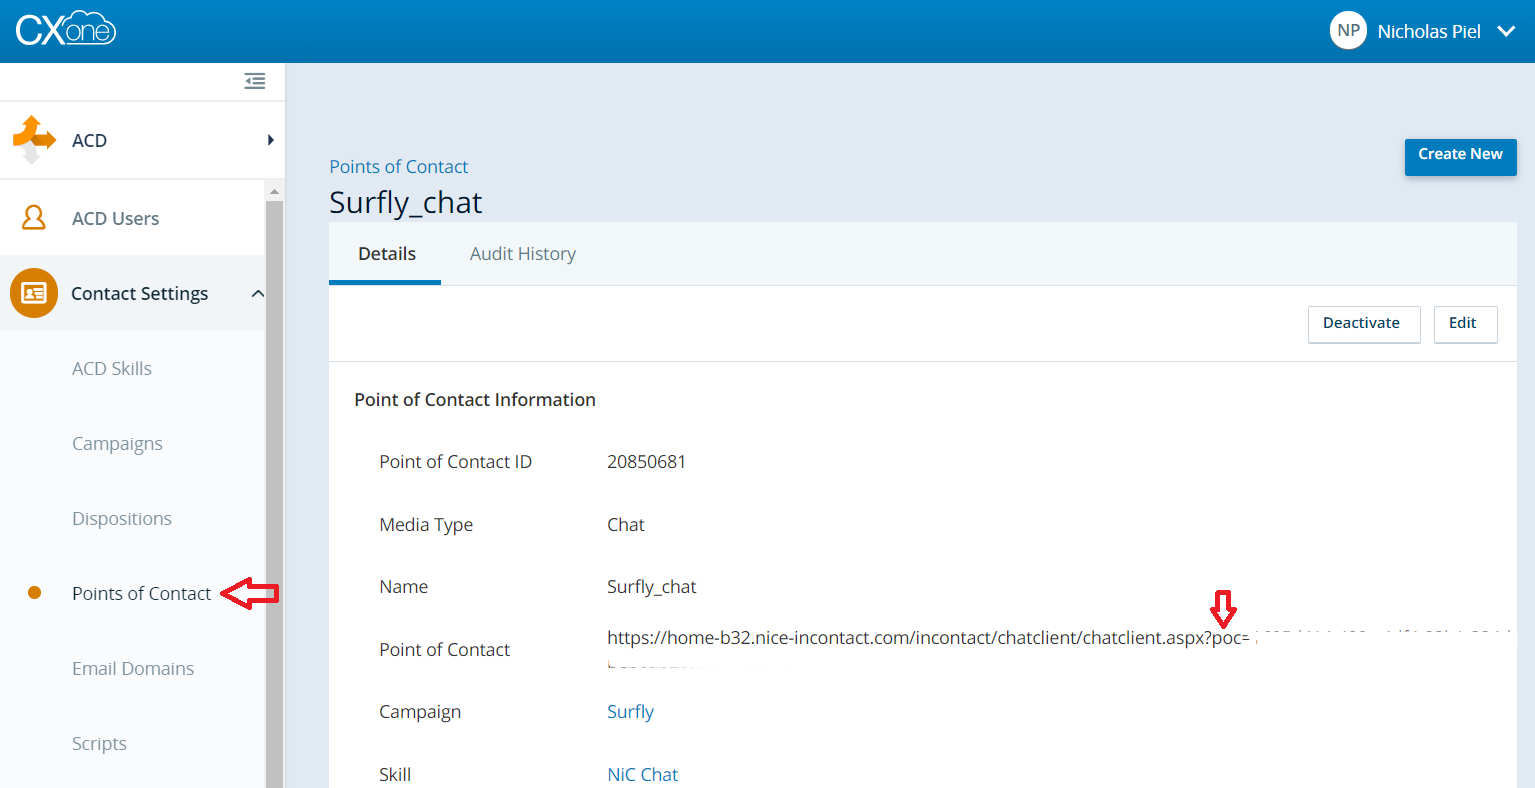
NiC Chat Point of Contact URL
Go to ACD → Contact Settings → Points of Contact → (your chat point of contact)
Copy the Point of Contact URL as shown here:
Create Frontend Javascript
The script depends on the following variables to work:
scaleDroneChannelId
nicBusNumber
nicChatPOC
clusterNiC
surflyWidgetKey
videoSignalerURL
chatSignalerURL
surflyModalTitle
surflyModalBody
Below is a example of HTML page with javascript
<html>
    <head>
    ...
    </head>
    <body>
        ...
        <script>
            var scaleDroneChannelId = 'fygLrCqVZQCdZfs6';
            var nicBusNumber        = '<BU_NUMBER>';
            var nicChatPOC          = '<NIC_CHAT_POC_ID>';
            var clusterNiC          = 'b32';
            var surflyWidgetKey     = '134f5fd2ac8842c0a1cd6062818eee74';
            var videoSignalerURL    = "https://home-b32.nice-incontact.com/inContact/Manage/Scripts/Spawn.aspx?scriptName=Surfly_Signaler&bus_no=XXXXXXX&scriptId=XXXXXX&skill_no=XXXXX&Guid=XXXXX-XXXX-XXXX-XXXX-XXXXXXX";
            var chatSignalerURL     = "https://home-b32.nice-incontact.com/inContact/Manage/Scripts/Spawn.aspx?scriptName=Surfly_Signaler&bus_no=XXXXXX&scriptId=86019322&skill_no=XXXXXX&Guid=XXXXX-XXXX-XXX-XXX-XXXXXXXX";
            var surflyModalTitle    = 'Start Videochat';
            var surflyModalBody     = 'By clicking Accept, an agent will automatically join you in a videochat session. You will be prompted to enable/disable your camera and mute/unmute your microphone. You can access your audio settings using the gear icon. You can end the videochat at any time, by clicking ✕ in the menu or by closing this tab in your browser.';
        </script>
        <script type="text/javascript" src="https://nic.surfly.com/surfly-nic-script.js"></script>
        ...
    </body>
</html>
Testing the Javascript File
To test the JS file you just generated, just copy and paste its content in your browser’s console and press Enter to execute the script.
You should see the Live Chat button appearing on screen:
Check for any errors that might show up in the console.
Open a MAX instance on another browser and take the call of the waiting user. Try launching a co-browsing session by clicking on the “Send Cobrowsing Invite”.
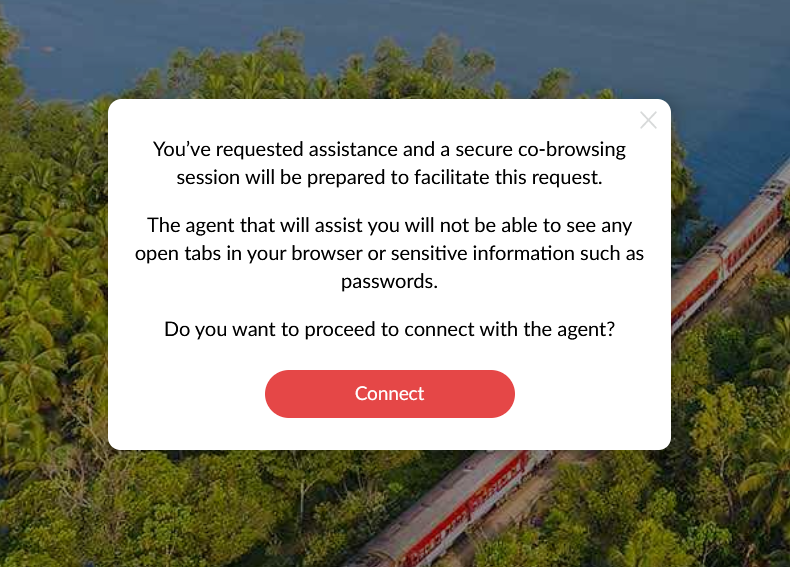
The customer should see this popup modal with the following message: